Sunday, November 29, 2009

Thanksgiving Day drive

1941 Chevrolet Business Coupe

While I was out on Thanksgiving day I spotted this 1941 Chevrolet Business Coupe in North Attleboro, Massachusetts. It was at a small garage that was selling other vehicles too. Being a holiday no one was at the garage to ask any questions. This looked in excellent shape. The paint looked in great shape and I didn’t see any major flaws. I thought the vintage 70’s Monte Carlo hubcaps was a bit odd. The interior was in very good condition.  There was a for sale sign in the window but, it gave no price. I hope it finds a good home. I just thought I’d share what I found. Enjoy!

1941 Chevrolet Business Coupe

1941 Chevrolet Business Coupe

1941 Chevrolet Business Coupe

1941 Chevrolet Business Coupe

Wednesday, November 11, 2009

2000 Ford Windstar oil change

Well I finally got around to changing the oil in my wife’s 2000 Ford Windstar. I took some pictures and thought I’d share them here. This isn’t a strict “by-the-book” type of “how to” post. I thought I’d share my experience and thoughts. I hope this would give some who’s considering doing this themselves or perhaps some with my experience some helpful points(or laughs).

DSCN0472 

Prior to tackling this task you’ll need a few items:

  • Oil Filter: In this case I used a Bosch Premium Oil Filter Part No. 3422. This Windstar is equipped with a 3.8 Liter engine, if you have a different engine you may have a different filter. Most places you buy a filter have a book you can look up your vehicle or just ask a store associate (if you can find one).
  • Oil: This vehicle calls for 5W-30. I don’t usually get too picky picking out a particular brand name. I change my vehicles oil every 3000 miles so I try and stay in a reasonable price range.
  • Oil filter wrench: There are many types of filter wrenches out there. In this case I had to use a “cap-type” of filter tool that you use with  a 3/8” ratchet wrench because of the tight spot the filters in.
  • Rags and hand cleaner: Your going to get some oil on your hands. If your squeamish about getting a little dirty stop here.
  • Dirty oil container: You’ll need a pan to catch the used oil.

First you’ll want to raise the vehicle to gain access. I use a set of steel ramps, chock the wheels and set the hand brake. Of course you’ll also want to do this on level ground.

DSCN0473

I crawled under on a creeper and used a 5/8” socket w/ratchet and removed the drain plug(placing oil drain pan underneath before hand of course).I usually let the oil drain out for a few minutes and then I replace the drain plug.

DSCN0474

I then locate the filter which is just behind the front passenger tire. It’s in an odd angle and tight spot so my favorite strap-type oil wrench won’t work. I had to pull out the type that fits on top of the filter and is turned by a 3/8’ ratchet wrench on top. I had to use an extension. I’m hitting myself on my head because I didn’t take a picture of it. I’ll add one at a later date.

DSCN0479

After I prep the the new filter by filling it part way with oil to prime it. Being sure oil up the gasket too. This can come out too help drown it in oil. I replace the filter and tighten it with the wrench, not too tight though. You can bind up the gasket which will leak, which is very bad. Not to mention the next time you go to change the oil it will be difficult to remove.

I then fill it up with recommended amount of oil, which is 5 qts. for this vehicle. I start it up and let it run for a bit. I usually take this time to clean up my area. Stop the engine wait for 10-15 minutes and check the oil level and add if necessary.

Some notes:

  • I goofed and didn’t check to see if I had oil spill cleanup stuff. I usually have some but when I went to clean up a small spill I didn’t have any. I need to pick some up before next oil change(my car this weekend).
  • I’ll also need a new drain plug. This one won’t last too much longer as some threads didn’t look too good. It’ll hold but, I’ll replace it next oil change.

Well that’s all for now. It’s a pretty straight forward oil change. Feel free to comment or ask a question. Like I said it wasn’t a strict how-to article but it’ll give you an idea of what to expect should you need to to this yourself. Have a great day!

Saturday, November 7, 2009

You Drive What?

funny_Car_4

It would seem that I spoke too soon. From the same people that bring you People of WalMart have now started a sister site called YouDriveWhat.com. It just started up the same day as my last post about there website..hmmm maybe somebody read my post, I don’t know. Here are some samples:

 funny_Car_11

funny_Car_13

Sunday, November 1, 2009

Car's of Wal-Mart

If you need a good chuckle be sure and check out Peopleofwalmart.com. Most of it shows the uh..um..unique customers that Wal-Mart seems to attract. I personally avoid the place like a plague. Yes I've seen people like those shown at the site. They also show the special types of vehicle shown like the one above. I'm still going through the site as I write this and I had to share this. Maybe they should have a spinoff website called cars of Wal-Mart?

Saturday, October 24, 2009

The Impala brake job

These are photo’s of me doing a front disk brake job on my 2000 Chevrolet Impala a few month’s back. For whatever reason I never got around to posting photo’s. It’s not really meant to be a “how to” as this was done a few month’s back and I didn’t take any note. This will give you an idea of what you’ll see if you should attempt to do this yourself. It’s not very hard to do if your mechanically inclined. I’ll be changing both the brake pads and rotors.In the old days one might get the rotors turned but, I know of no one that actually does that these days.

IMG_3713

If you haven’t guessed it this is how it looked when I first pulled the the wheels off. This being the first time since owning the car for five years these brakes don’t owe me anything. They’ve performed as they should without problems until now.

IMG_3714


If you can see it in the little window you can see the back plate(steel) of the pad is in contact with the rotor. This is bad and should be replaced.

IMG_3715

As you can see I applied a liberal dose of spray lubricant. There are four bolts to remove and they don’t like coming off.

IMG_3720

IMG_3719

After removing the two outer bolts I removed the inner part off the caliper. We now have access to the brake pads. We can now really see how bad these pads were.

IMG_3722

As you can see there isn’t much left of these pads.

IMG_3724

The second part of the caliper is removed. This is the first vehicle I’ve done with this type of caliper.

IMG_3725

What the inside of the rotors looked like.

IMG_3727

My nice new rotor from AutoZone(Duralast Part No.55034)  is installed.

IMG_3731

Brake Pads(AutoZone, Duralast Gold Part# DG699)are now installed.

IMG_3732

Everything is now back together. That was fun wasn’t it? The next side was pretty much the same. This will at least give you an idea of what lies ahead should you try this yourself. Thanks for coming by and have a great day!

Saturday, October 17, 2009

2000 Ford Windstar : Changing a brake light

IMG_4376

These are just some photo’s of me changing a brake light bulb on my wife’s 2000 Ford Windstar. It’s a fairly straight  forward task. It took me about 15 minutes to do(and that’s probably stretching it). The only tool you’ll need is a Phillips screwdriver, well maybe you’ll need something to pry the light housing off too.

IMG_4379

You’ll need to open the rear tailgate to access the housing. The bulb I used was a Sylvania Part No# 5157LL. I think different manufacturers may make them so check at your friendly local auto parts store for your vehicle.

IMG_4380 

At the top off the taillight you’ll find to Phillips head screws. I think you know what to do here.  Once the screws are are off you’ll have to pull the housing off. It’s held in by two tabs that have small metal clips that grab onto plastic tabs. Take care pulling it off as to not break the plastic tabs. Here is where I used a flathead screwdriver to pry it off. I did it because someone had put two of the metals clips where there was only suppose to need one. Obviously I think this taillight was replaced sometime prior to us owning the vehicle as I doubt this came from the factory like that.

IMG_4385

The brake light is located in the middle socket. A simple turn off the socket and you’ll have access to the bulb. Pull the old bulb off and replace with you new bulb. I tested it before putting it back together again just in case I had a dud. It worked great and I put it back together(without the extra clip) and all was good. Like I said before It only took me about 15 minutes to do and is a fairly simple job to do. Well I just thought I’d share this in case someone out there was wondering how this was done. Thanks for coming by and have a great day!

Tuesday, October 13, 2009

Rear Disc Brake job on 2000 Impala

I’ve finally gotten around to uploading the pictures from my task of replacing my rear disc brakes on my 2000 Chevrolet Impala LS. They had been scrapping for a few weeks until I got to them. This more of a pictorial of my job than a strict “how-to” post. Partly because I didn’t take any notes as to exact sequence or tools used. This was actually done two weeks ago and I’m going by memory so forgive my lack of foresight in taking notes. I’ll give a play-by-play with the pictures as best I can. Here we go….

IMG_4325

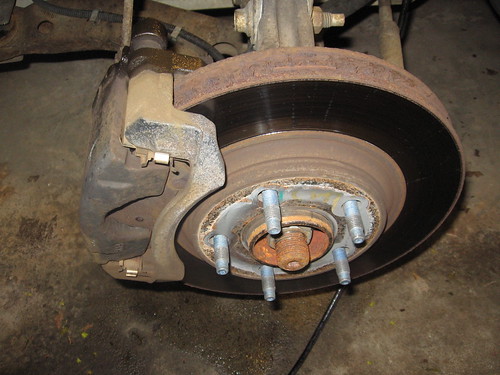
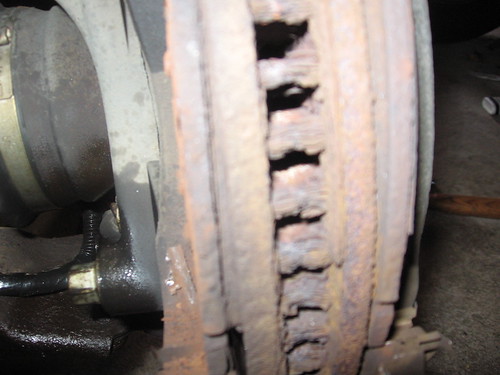
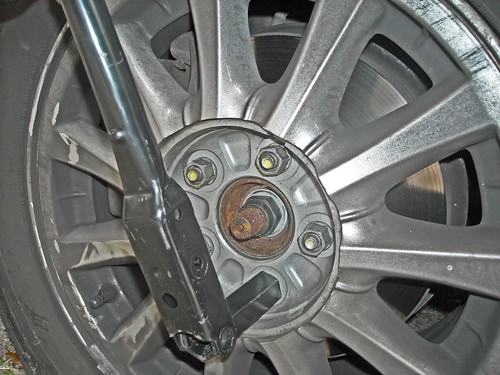
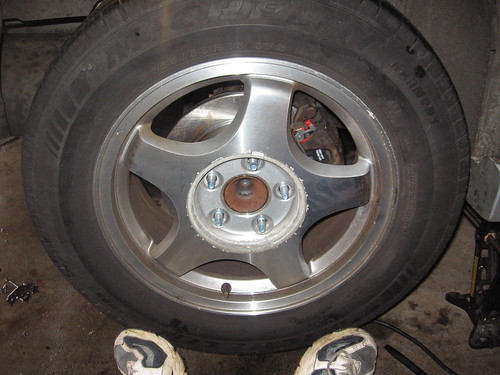
In this picture is the rear disc brakes of Impala. As you might guess they’ve been on there quite awhile. This is the first time I’ve done these since buying the car just over 5 years and 86,000 miles ago. They don’t owe me anything as far as I’m concerned. From the normal surface rust they don’t look that bad, just you wait.


IMG_4326

IMG_4327

IMG_4328

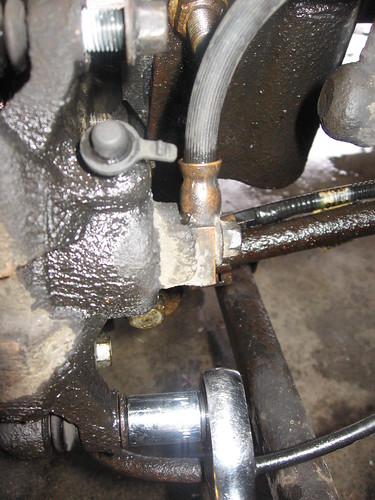
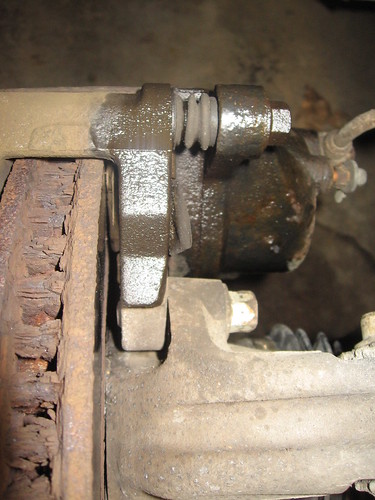
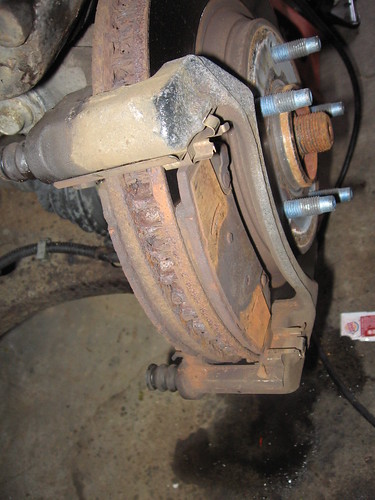
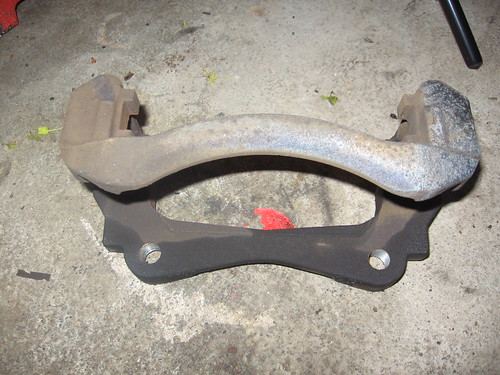
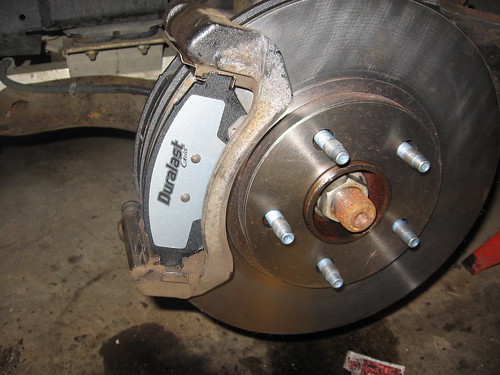
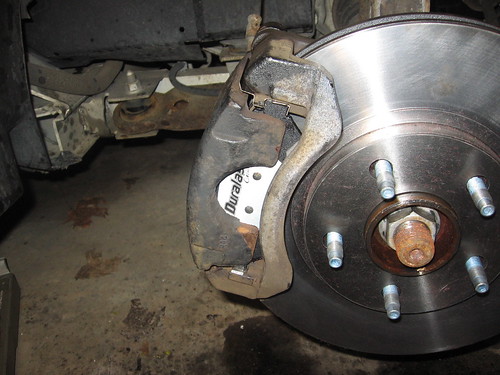
No “uber” special tools needed for this job. A basic socket set, some hand wrenches and perhaps the the only “special” tool you may need is a disc pad spreader which are easily purchase for less than $10 at a parts store. These GM brakes are actually two separate parts. One holds the caliper piston(inside) and the other(outer) holds the brake pads. You’ll need to remove 4 bolts. Two for inner caliper and two for the other. I’d advise to drowning these in your favorite spray lubricant. A rubber mallet (or striking device of your choosing) may be needed to break these loose. I got lucky on one or two that came loose fairly easy but some others didn’t cooperate. 

It looks as if I’m using a 14mm socket in the top picture and I was loosening the bolts to inner caliper. The outside caliper uses a slightly different size socket.

Advisory: Small children should not be close by as they may accidentally learn some new words.

IMG_4329

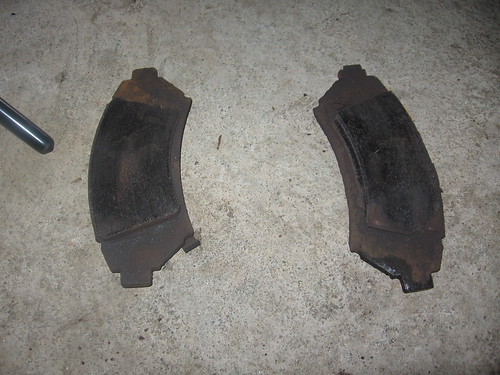
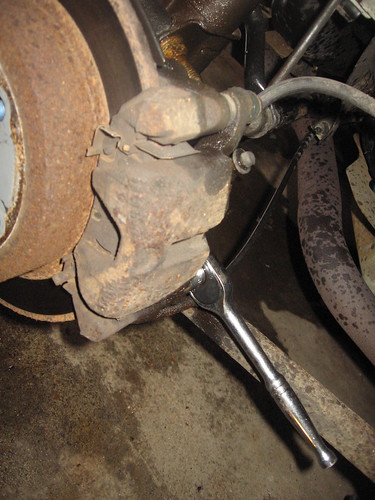
Here can see a little of the pads. Doesn’t look like much pad left at all.

IMG_4331

IMG_4330

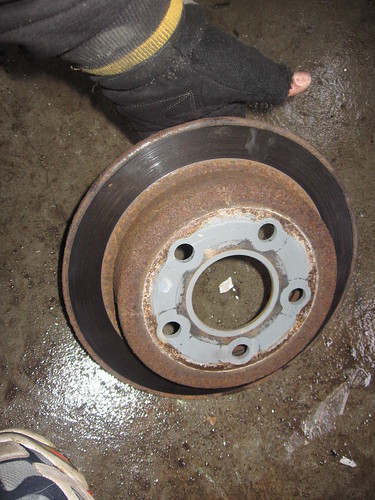
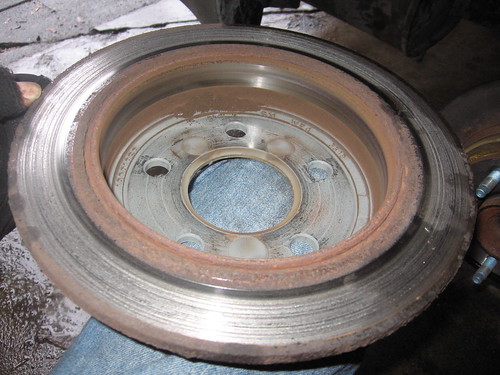
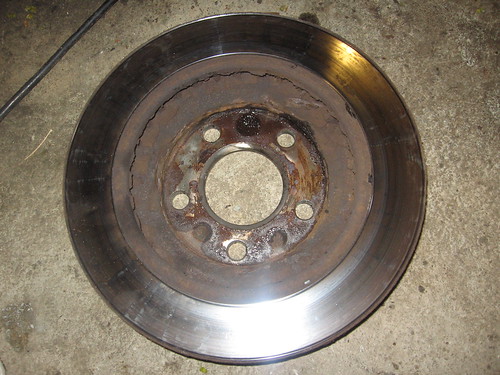
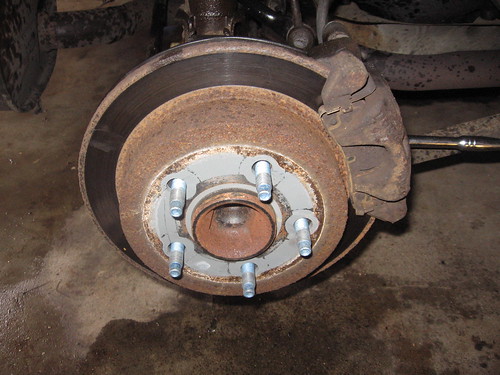
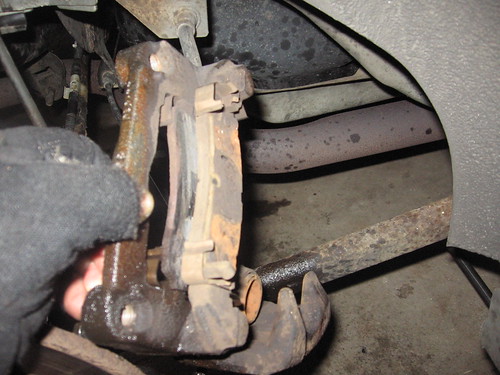
These are what’s left of my rotors. The outer part of the rotor actually didn’t look bad. When you turned them over it was a different story. This is what happens when your pads run down to bare metal. They were scored pretty bad.

IMG_4332

IMG_4333

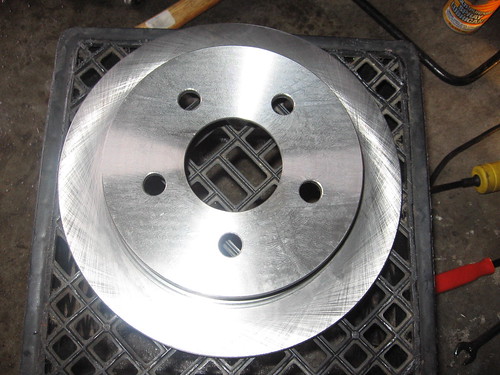
This my nice new brake rotor from AutoZone. They are Duralast Part# 55039, they were about $42.99 a piece(plus tax).

IMG_4335

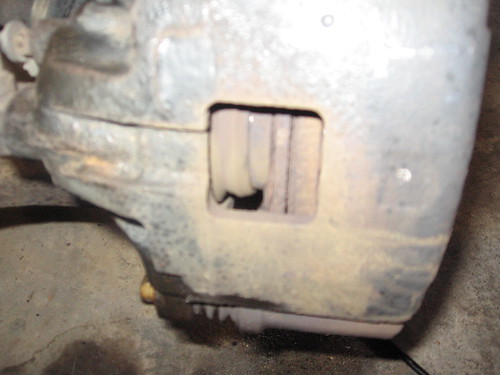
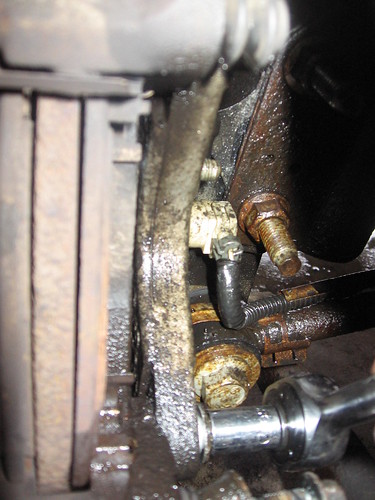
Here we can see that the old pad was down to the metal pad. These were scrapping bad before I changed them.

IMG_4336

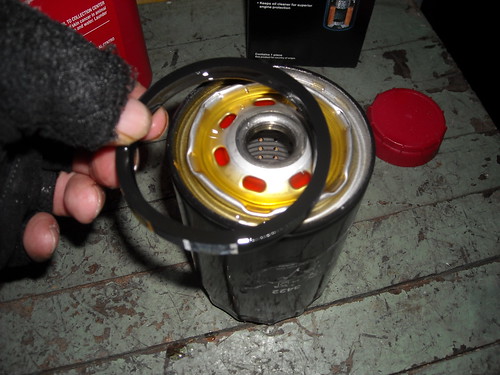
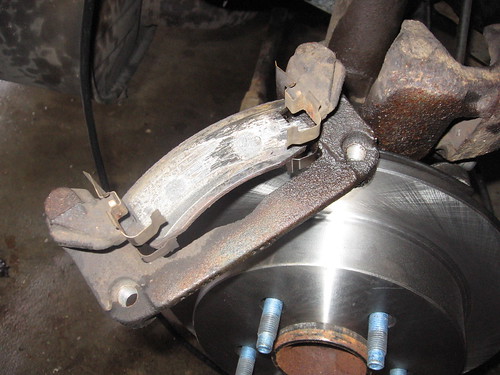
The pads were Duralast Part #MKD814, also used was a liberal application of disc brake quiet lube(in red).

IMG_4337

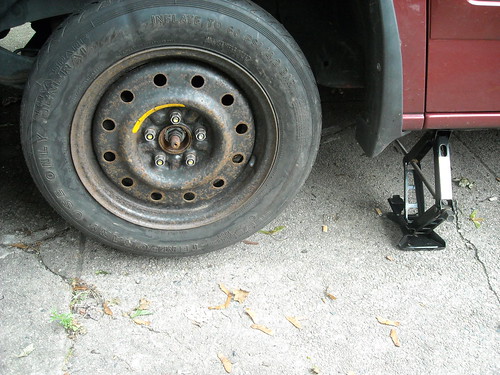
Pop my wheel back on and I was done. Well I was done on one side. The other side went pretty much the same way. I did make note of some stuff that would have made this job a bit easier.

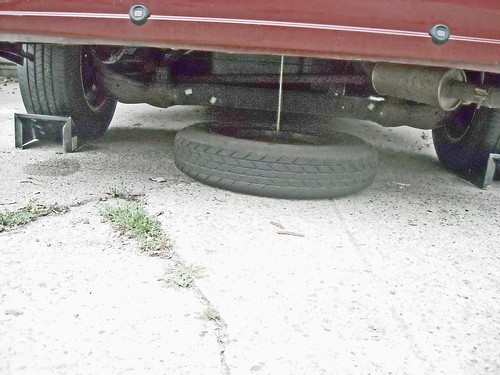
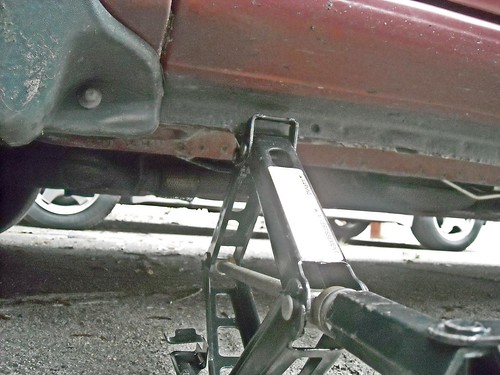
  • Floor Jack – I had to use the regular car jack from the trunk. It’s not the recommended way to do the a brake job. I did have one car(not this one) almost fall on me from a car jack and it certainly got my attention.
  • Creeper seat – My rear-end was sore from the milk crate I used for a seat.
  • Breaker Bar – To break loose those stubborn bolts.

In all I think this took me about 2-1/2 hours(for both sides) and, I was taking my time doing it too. If your handy with some tools this shouldn’t  be a tough job for most do-it-yourselfers. Thanks for coming by and if you have any questions or comments feel free to leave a message below. 

P.S. I also have pictures of my front disc brake repair I did in the spring time. I’ll be publishing those very shortly.

Tuesday, September 29, 2009

1953 Oldsmobile 88


1953 Oldsmobile 88
Originally uploaded by Bob Cutlass
This photo may be headed for publication soon. I'll post an update when I know more.

Friday, August 28, 2009

Dave Ramsey on Cash for Clunkers

Financial Guru and radio personality Dave Ramsey the Cash for Clunkers program. He compares it to sub-prime mortgage program that was a major contributor to recession we’ve been experiencing. I also agree that it may put people in cars that should not be buying a new car who normally wouldn’t be able to. Which is much like the sub-mortgages were doing in the housing market.  

Cash for Clunkers was simply a way for broke people to buy cars that they really couldn't afford. – Dave Ramsey

IMG_2490My thought on the matter was that on a personal level it doesn’t make financial sense. Most of the vehicle that were turned in more than likely were already paid off and owned by the drivers. Now they take a new car payment every month. Also new car more than likely takes a hit on value as soon as it’s driven off the lot. Which nullifies the $3500-$4500 discount. The whole program was a bad idea in the first place which had minimal (if any)impact on the environment when you consider the “carbon footprint” of manufacturing a new car to replace the clunker.

It may have been a good deal for those already planning to buy one anyway and could afford it. I’m glad it’s over and now the taxpayers got the bill.

Thursday, August 27, 2009

For Sale: 1984 Porsche 911 3.2 Carrera Cabriolet

This one is a beauty! A well cared for ‘84 Porsche 911 3.2 Carrera Cabriolet. This has been well maintained and has had many upgrades in the past few years. It’s black with burgundy interior with a recently replaced soft top.Aviary cgi-ebay-com Picture 1

This item is being listed on Ebay here and is located in Cumberland, Rhode Island. Why do I show this one? It’s owned by my cousin and I know he’s very meticulous about his cars. See listing for more detailed information. I’d love to see this one go to a nice home.

Thursday, August 6, 2009

Top ten list of vehicles that shouldn’t be traded in for “Cash for Clunkers”

IMG_2491

Technorati Tags: ,,

I have more personal reservations about this popular program. Seems like a whole lot  of money thrown away for minimal effect on the environment. Also as an automotive enthusiast I hate to see vehicles that still have some life left in them utterly destroyed. Engines in these vehicles are destroyed and then crushed. No parts are resold except what’s left after crushing. Forever destroying valuable parts that might have been resold or reused. I compiled a list of vehicles built in the last 25 years that in my opinion should be saved from the scrap heap if possible. I did check out all models hear on the official list of cars eligible for the program. Some models are borderline and only certain engine types are included. Well here we go:

  • Chevrolet Corvette 1984- present : Yes the Corvette is on the list. This really should be a no brainer but, you never know. You know some numbnut somewhere is contemplating turning in his 85 ‘Vette. If you know him slap across the face.
  • Chevrolet Camaro/Pontiac Firebird (all years) – There are enthusiasts dying for your parts. Just look for the guys with the mullets.
  • Buick Grand National 1984-87 : These are collectable and demand will increase with time.
  • Ford Mustang (any year)
  • Dodge Viper
  • Plymouth Prowler
  • Porsche – Yes most 911’s qualify for the program.
  • Dodge Charger: Yes believe it or not the 6.1 Liter equipped Charger does qualify for the program. Though I believe that most people wouldn’t turn this one in you never know.
  • Chevrolet Monte Carlo SS/Oldsmobile Cutlass Supreme 442 (84-87): I love these old g-body’s from GM.
  • Chevrolet Impala SS 94-96

I think most people would sensible enough not turn many of these vehicles in list but, you never know. Many of these vehicle’s enjoy a following of enthusiasts that would certainly benefit from these vehicles staying on the road. As many of these vehicles get older there parts (especially body or trim parts) get harder to find.

This is just my personal list. Feel free to add what you think I missed and should be saved from the crusher.

Monday, August 3, 2009

How-To Change tire on 2000 Ford Windstar

My wife asked me to check on one of her tires on her minivan. When I checked it I discovered it was completely flat. Being Sunday with few garages open I decided to change it and put the “donut” spare on until we can take the tire in to be checked and hope fully repaired. I’m just going to go through the steps I went through to change it.

DSCN0408_edited-1

Disclaimer: This is only a demonstration. Please consult your owners manual and use all safety precautions possible.

First step I took was to locate the spare and check the condition. On the Windstar it is located under the vehicle behind the rear bumper. I then consulted the owners manual on how to lower the spare to the ground.

DSCN04101

To lower the tire I had to turn a nut located under a plastic cover(near left arrow) with a the lug wrench. This brought up a second question, Where is the jack and lug wrench. It is located in a compartment on the right hand side of the vehicle(near large right hand arrow).

DSCN0413_edited-1

Turn the two knobs and the door will flip open to reveal your jack and lug wrench. Unscrew the hold down bracket to remove them.

DSCN0411_edited-1

I popped open the plastic cover to reveal the nut that lowers the spare.

DSCN0414_edited-1

Attaching the lug wrench I then turned in a counter clockwise direction to lower the tire.

DSCN0416_edited-1

After lowering it to the ground I removed it from the cable. I had to tap on center hole to break it free from the rust and debris.

Before starting on the tire I took some basic precautions like chocking the wheels and applying the handbrake.

DSCN0418_edited-1

Then I popped the center cap off. I loosened the lug nuts first but, left them on.

DSCN0423_edited-1

The owners manual tells me to locate the jack in a notch behind the wheel. Unfortunately the authors of the manual forgot to tell the engineers to put one in. I placed the jack about 6-8 inches behind the wheel and jacked the vehicle up.

Then I removed the lug nuts after raising the vehicle high enough to take the tire off.  With both hands I removed the tire and replaced it with the spare. I replaced the lug nuts and snugged them up before lowering the vehicle.

DSCN0424

After lowering to the ground I tightened up the lug nuts again. Then inspected the tire to see if I could find the leak. We’ll be taking it to the shop to have them take a look at it and possibly repair. One must remember that these tires are only temporary should be rode on sparingly.